As a group we had decided to anodise the bats gold. Bonnie recommended Badgers who very generously offered to anodise both bats free of charge being from BCU, which should have cost £50 plus VAT. They needed them by midday to begin the process to get them back the following day. We weren’t able to get the updated prototype water jet cut until Thursday so we anodised the original two for experimentation.
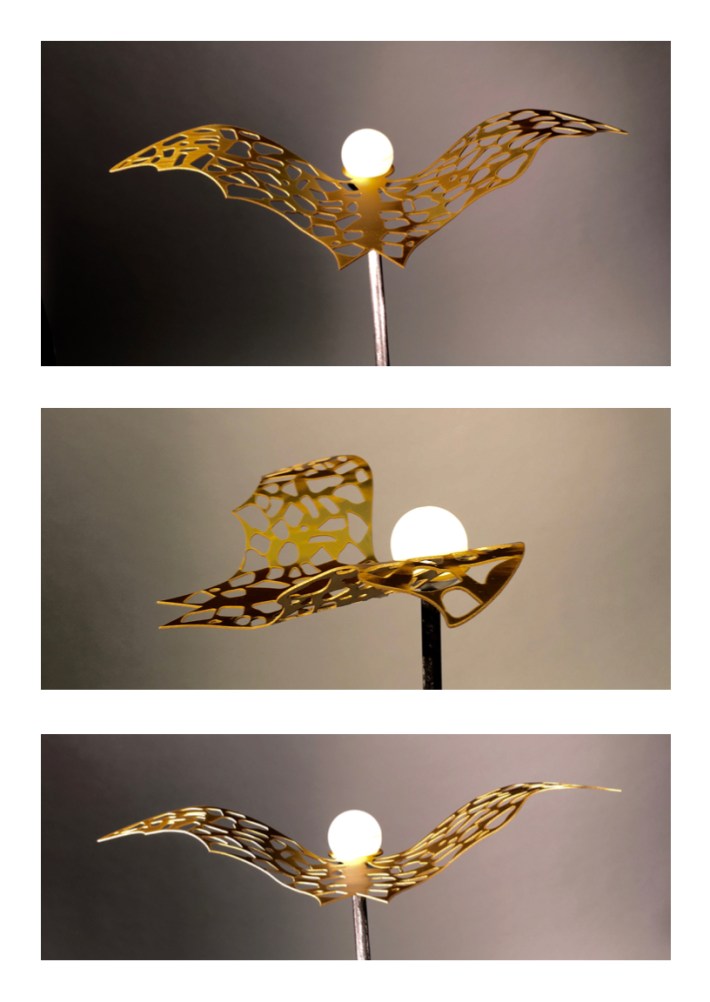
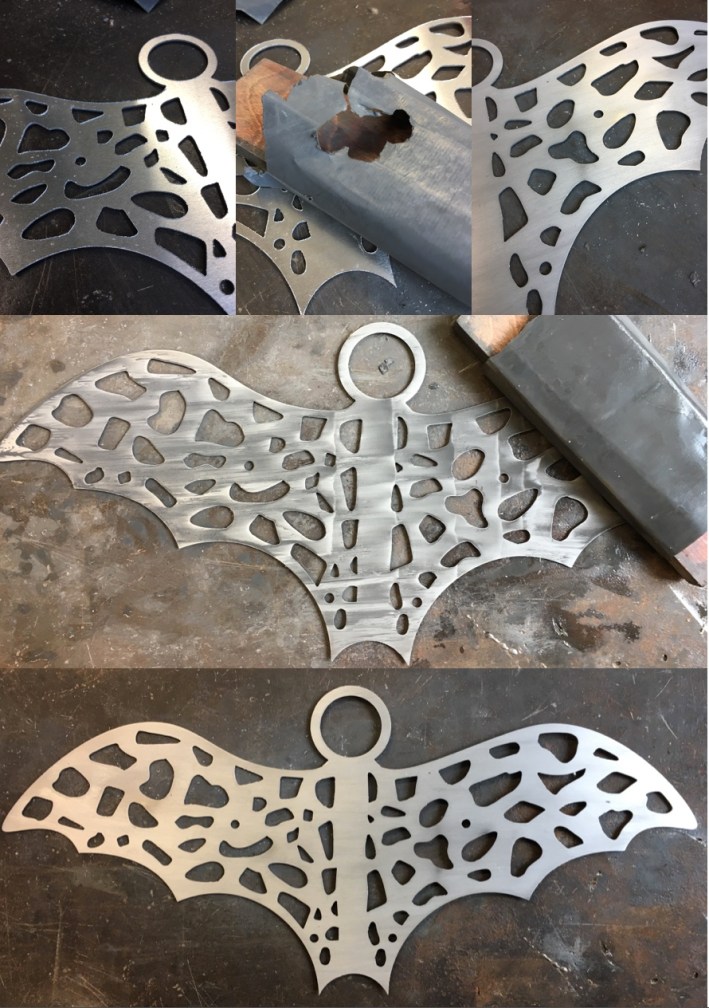
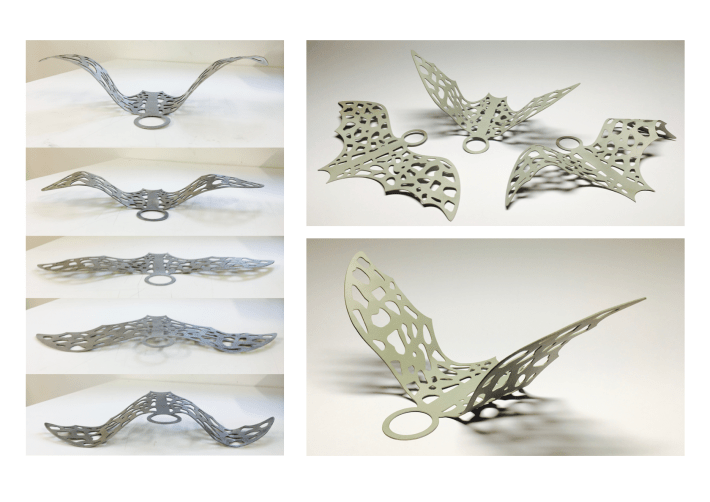
We plan on representing the bats in three different stages of flight – flat, wings up and wings down. The wings were formed by securing the in a vice, and bending them over a rounded wooden surface. (JL)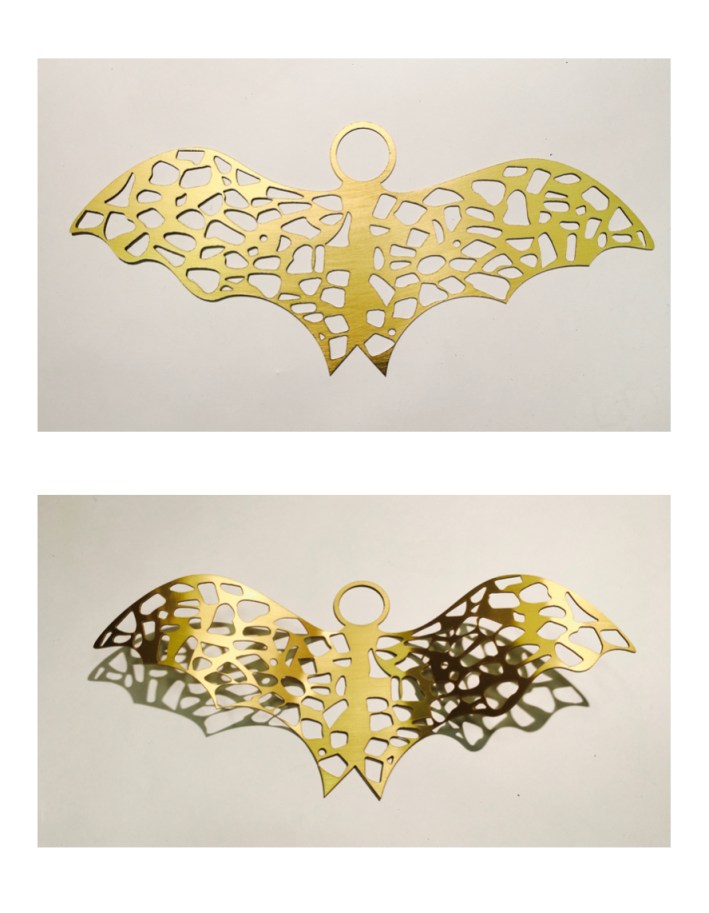
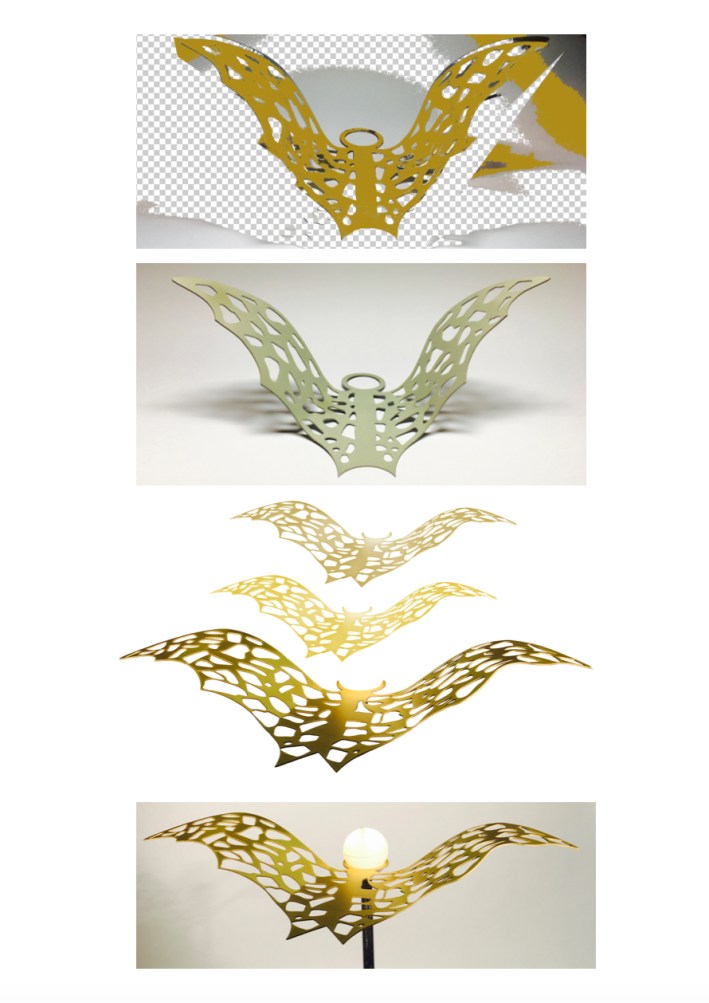
I had made a light in a previous Philips lighting project with a shade made from a table-tennis ball which was conveniently about the same size as the eW Flex Compact we would use and was illuminated with a 12v LED. I secured the bat in the fitting and photographed it in the studio. (JL)

I used the bent bat facing upwards and downwards to represent the bats with both wings up and wings down.
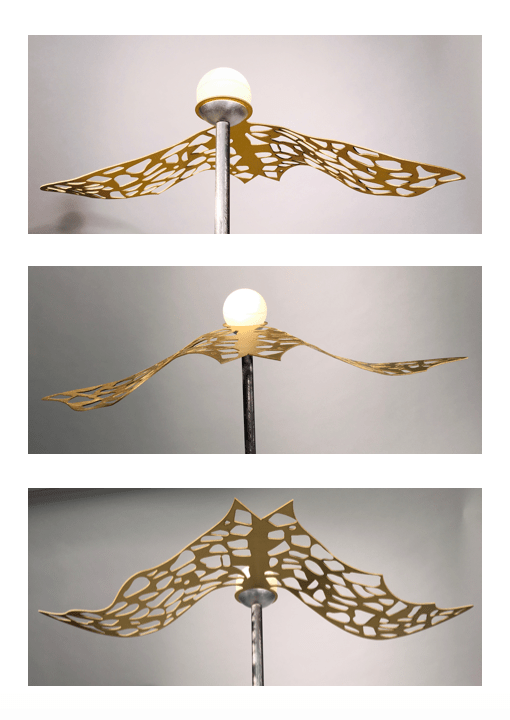
We decided to keep to the 1mm aluminium considering weight, the environment and cost. After Ayesha updated the design and they were water jet cut I began finishing them. With fewer holes the structure felt much sturdier. They were sanded up to 1200 grit using wet and dry to remove any sharp edges, and to get them to a finish suitable for anodising. (JL)
As these ones weren’t being anodised I tried polishing one for the presentation, but it wasn’t a safe shape for the machine, and didn’t respond particularly well to the process being such a soft metal, and also felt unnecessary. 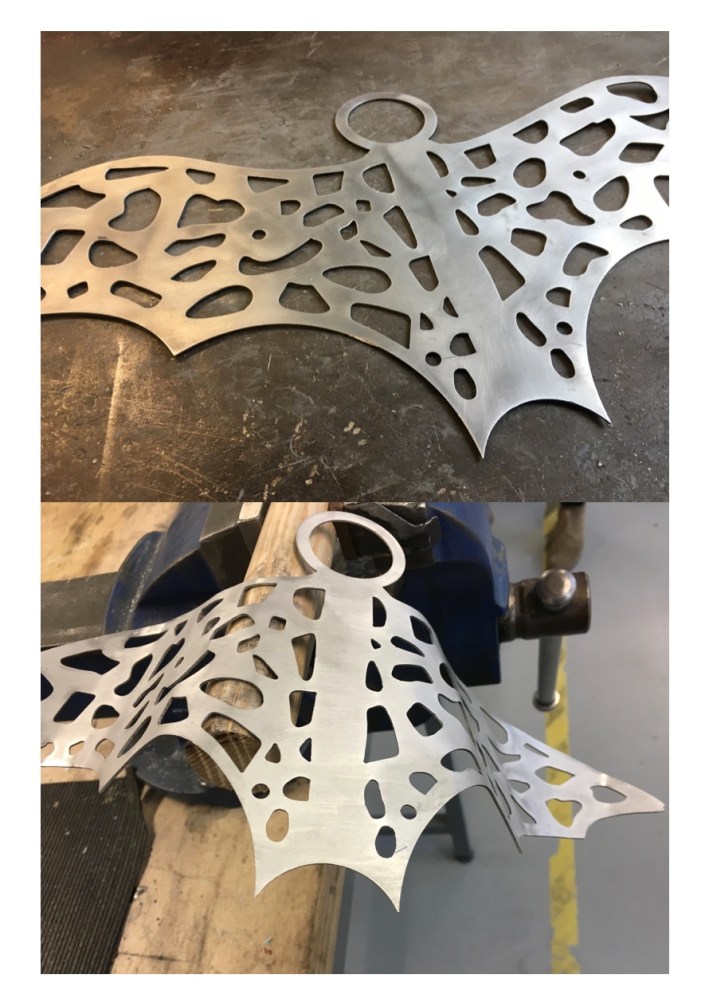
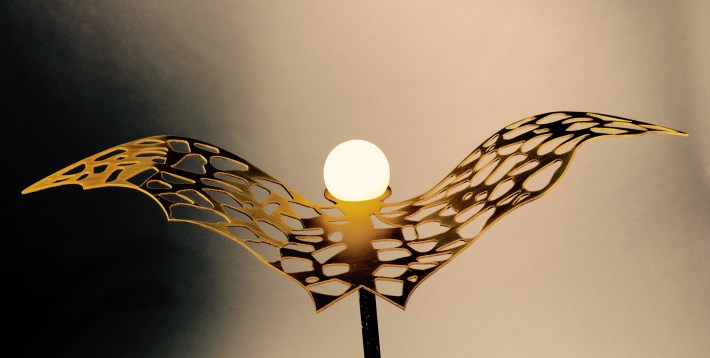
After photographing the bats I thought they deserved to look better for the presentation with not being anodised, so I sandblast them. I also changed the shape after referring to the flight study Adam posted to make them ‘less bird like’, and photographed them in a more suitable area. (JL)

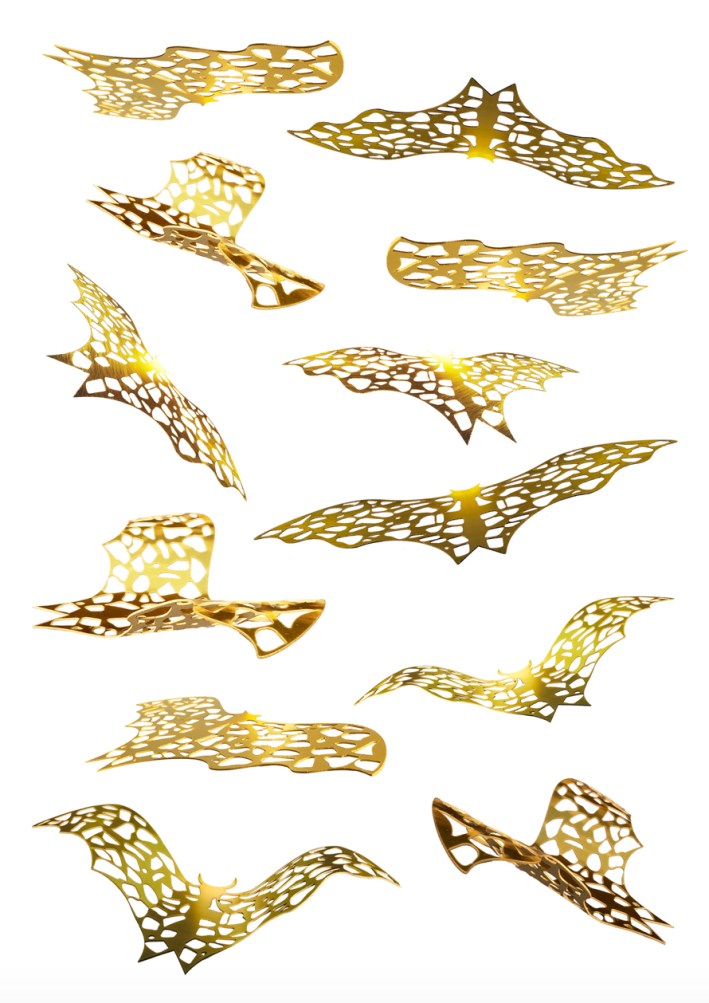
For the final animation I had wanted to use the newer form, but when I tried altering the colour to gold on photoshop it wasn’t successful, so I decided to use the anodised ones. I made the previous animation with a vectorised bat image I then turned into paintbrushes. I tried this with the anodised bats, but the colour was too flat. I preferred the anodised ones I photographed in the studio as the colouring wasn’t so uniform, and also captured the reflected light. I had to remove their ‘heads’ for the film, and then replace them using a paintbrush to achieve the flickering light effect. (JL)
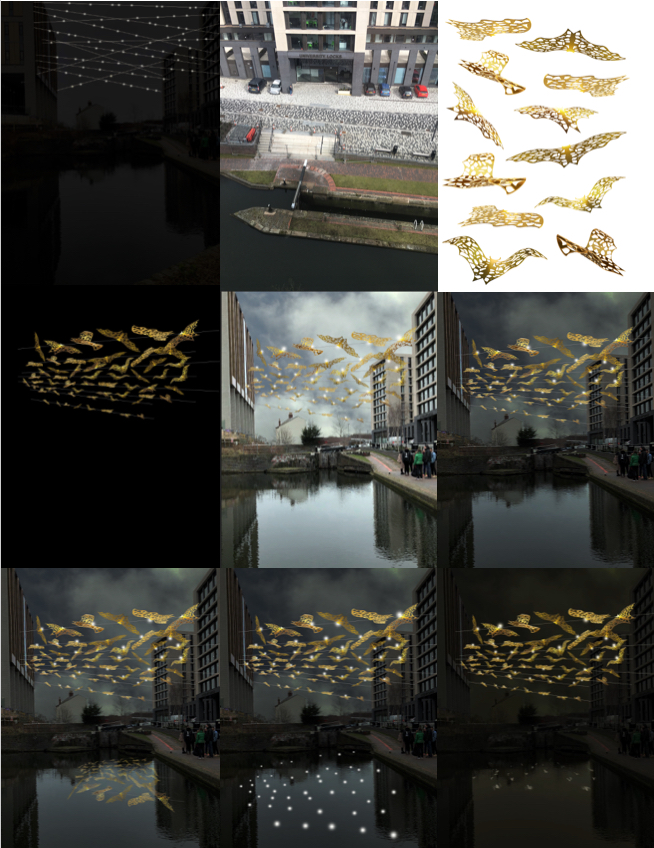
I made a quick mockup of the animation to present to the group for advice. If I made it to scale the bats wouldn’t be visible at 1:120 scale, so we decided on starting it from Curzon building. After photographing it I really struggled with the perspective so went back to the original image Adam had taken, but with having a bit of artistic licence with the size of the bats, so you can see the design. I attempted one with a darkening sky but it wasn’t fluid enough when animated. The first one didn’t have a reflection which looked wrong, so I tried with bats in the water but it looked too unrealistic.
I then used the lights from the bats which were too large, but it would have be impossible to reduce the size of the individual lights without reducing the size of the overall mass, so I played around with filters and the ripple one seemed the most effective. (JL)
It’s available to view via Vimeo.

You must be logged in to post a comment.